
WP-QDA Marked Text
- rcragun
- 0
- on Jun 27, 2011
About
WP-QDA Marked Text is a plugin for WordPress designed for rudimentary Qualitative Data Analysis (QDA). While there are a number of highly developed programs available for Qualitative Data Analysis (e.g., see here), much of that software is problematic for end users for one of several reasons:
- QDA software is often very expensive (ranging from $100s to $1000s)
- QDA software can be difficult to use and may have many features the average user does not need
- QDA software is often platform dependent, meaning it either runs on Windows or Mac, but rarely on Linux
WP-QDA aims to address all three of these problems. First, it’s free (though it does require a web server). Second, it is very rudimentary – you can code text into nodes/categories and retrieve the text coded into those categories. That’s it. Third, it runs on a web server, which means it is compatible with any platform that has a web browser. If you’re looking for free software that is platform independent and simple to use for your QDA needs, WP-QDA Marked Text may be what you’re looking for.
Installation
In order to install and run WP-QDA Marked Text, you’ll need the following:
- A working installation of WordPress. You cannot install WP-QDA on wordpress.com as they do not allow the installation of third-party plugins. Thus, you’ll need to find another server (or set up your own local server) that runs the WordPress software.
- The WP-QDA Marked Text plugin files, which are available here or through the WordPress plugin repository.
Installation of the plugin is standard for WordPress plugins. From within the WordPress backend, you can click on “Plugins->Plugins”, search for “WP-QDA Marked Text” and let the WordPress software install the plugin for you.

Alternatively, using an FTP client you can upload the plugin to the ‘/wp-content/plugins’ directory.
Then go to “Plugins->Plugins” on the WordPress backend, find the WP-QDA Marked Text plugin and select “Activate.”
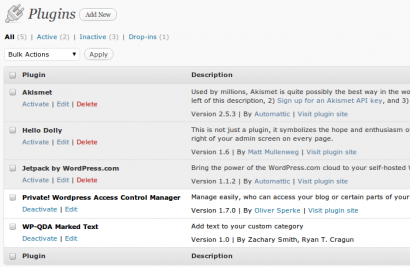
Once you have selected “Activate” you’ll see several changes on the backend of WordPress. First, you’ll see a new menu (which doesn’t do anything at present): “Code Text Manager”.

You’ll also see a new Widget (“Appearance”->”Widgets”) called “Marked Text Category”. In order to retrieve text you’ll need to put that Widget in your Sidebar.
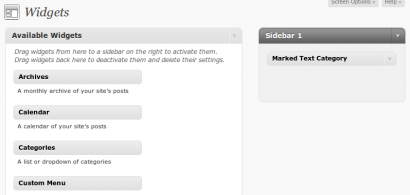
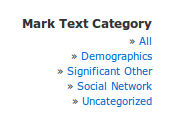
Adding this widget will put a box on the frontend of the WordPress installation that lists all of your categories for coding, like this:
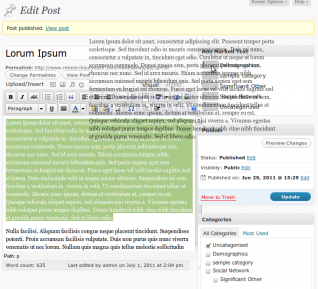
Finally, you’ll see a new box on the post creation or post editing page:
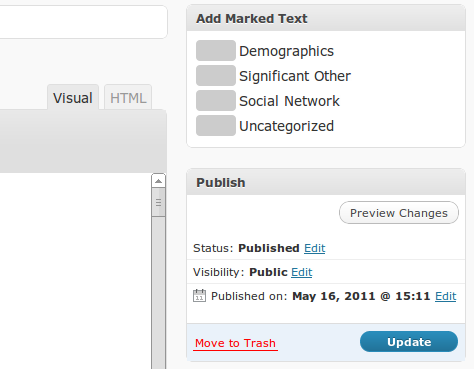
This is the page where you’ll do your coding.
Coding
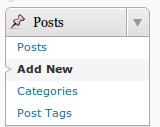
In order to code text you first have to copy the text into WordPress. To do this, select “Posts->Add New”.
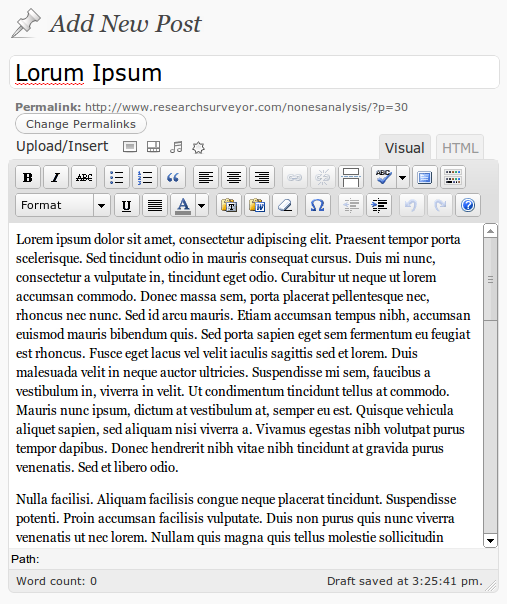
Then give your post a title and copy and paste the text you want to code into the text box. (Note: If you don’t want to copy the formatting, paste it into the HTML box.)
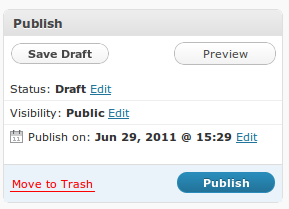
Before you can code the text you need to publish it. By publishing the text you are making a record of it in the WordPress database, which the plugin requires before it can code the text. (Note: If you are worried about confidentiality, see the section on Privacy and Confidentiality below). To publish the text, simply hit “Publish”.
You also need to do one more thing before you can code text – create Categories. The whole idea behind qualitative data analysis (QDA) is that you are finding themes within a body of text and want to be able to retrieve those thematic sections later for closer analysis. Thus, “Categories” in WP-QDA Marked Text serve as the “theme” identifiers (often called “nodes” in QDA). To create a Category, look on the right side of the “Edit Post” screen below the “Publish” button and you’ll see a list of “Categories.”
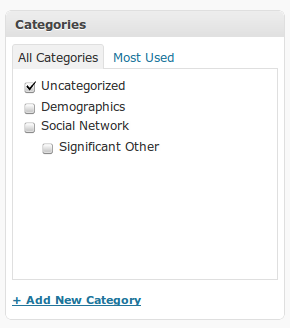
At the bottom of that box is a link that allows you to “+Add New Category”. Click on it, then type in the name of your new category in the resulting text box.
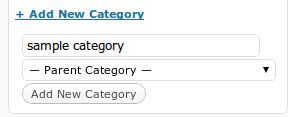
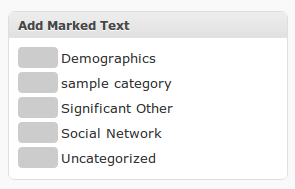
While the Category is added to the lower list of Categories, in order for it to appear in the “Add Marked Text” box you need to refresh the page; hit your browser’s refresh button and your newly added Category will now be in the list of Categories in the “Add Marked Text” box.
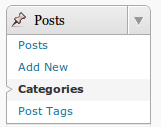
You can delete (and add) categories from the “Posts->Categories” menu.
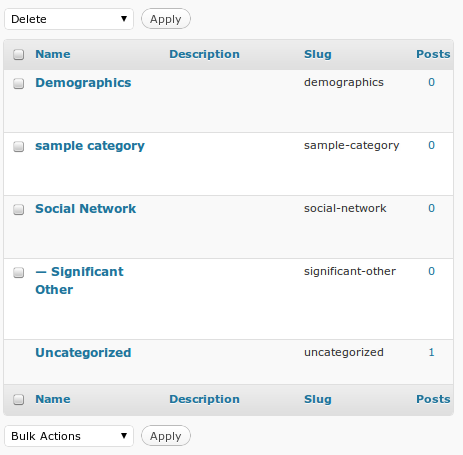
(Note: Deleting a category does not delete all of the text coded into that category. That has to be done separately as shown below.)
Once you’ve created your Categories (a.k.a. nodes or themes), coding text involves selecting text from the text box and dragging it into the grey box next to one of the categories. The plugin should automatically code the text into that category once your mouse leaves the “Add Marked Text” box and refresh the post at the same time. If it doesn’t, you can simply hit the “Update” button.
Text Retrieval
In order to view the text that has been coded into a specific category you need to first put the Marked Text Category widget into the sidebar.
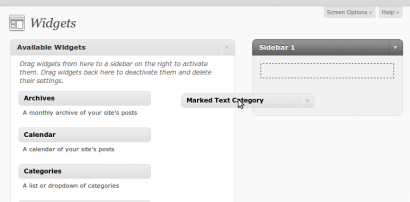
There are no options for the widget.
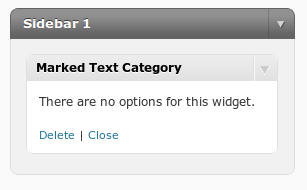
Then, navigate to the frontend of WordPress. There you’ll see your sidebar widget labeled “Marked Text Category”.

To retrieve all of the text coded into a category simply click on one of the categories.
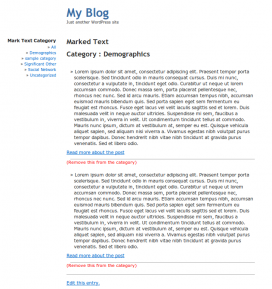
You’ll notice two links at the bottom of each piece of retrieved text. The first (in blue in the screenshot above) is a link to the entire post so you can put the coded text back into context. This link reads, “Read more about the post.”
The second link (in red in the screenshot above) is a link that allows you to remove text from a category. This link reads, “Remove this from the category.”
Removing Text from a Category
To remove text from a category, first go to the frontend of WordPress. In the Marked Text Category sidebar box click on the category in which the text was coded. Find the text you want to remove and select the red link below the text that reads “Remove this from the category.”
Privacy and Confidentiality
Depending on the nature of the text you are coding, you may also consider downloading the plugin “Private! WordPress Access Control Manager”. While that plugin is complex and perhaps more powerful than necessary for how I am recommending you use it here, it does make it so posts are private by default, meaning only those individuals with an account on your installation can view the posts and retrieve text. To set all posts private by default, install “Private! WordPress Access Control Manager”, “Activate it”, then enable it (“Users->Private Settings”):

Additional Information
I downloaded and installed the theme “White as Milk” as it is a simplistic theme that focuses on text rather than graphics. I find it easier to work with WP-QDA Marked Text with minimal graphics interfering.
Contributions and Donations
I am not a computer programmer and did not develop this plugin myself. I used money from a grant to pay a programmer to develop this plugin for use on the grant-funded project. If you are a computer programmer and would like to contribute or if you are a user of the plugin and would like to see further development of the plugin (e.g., the addition of features), please contact me or consider donating to the plugin’s future development.